Get your team trained in under 10 minutes
A six-step walkthrough for new organization admins — from signing up to onboarding your first learner.
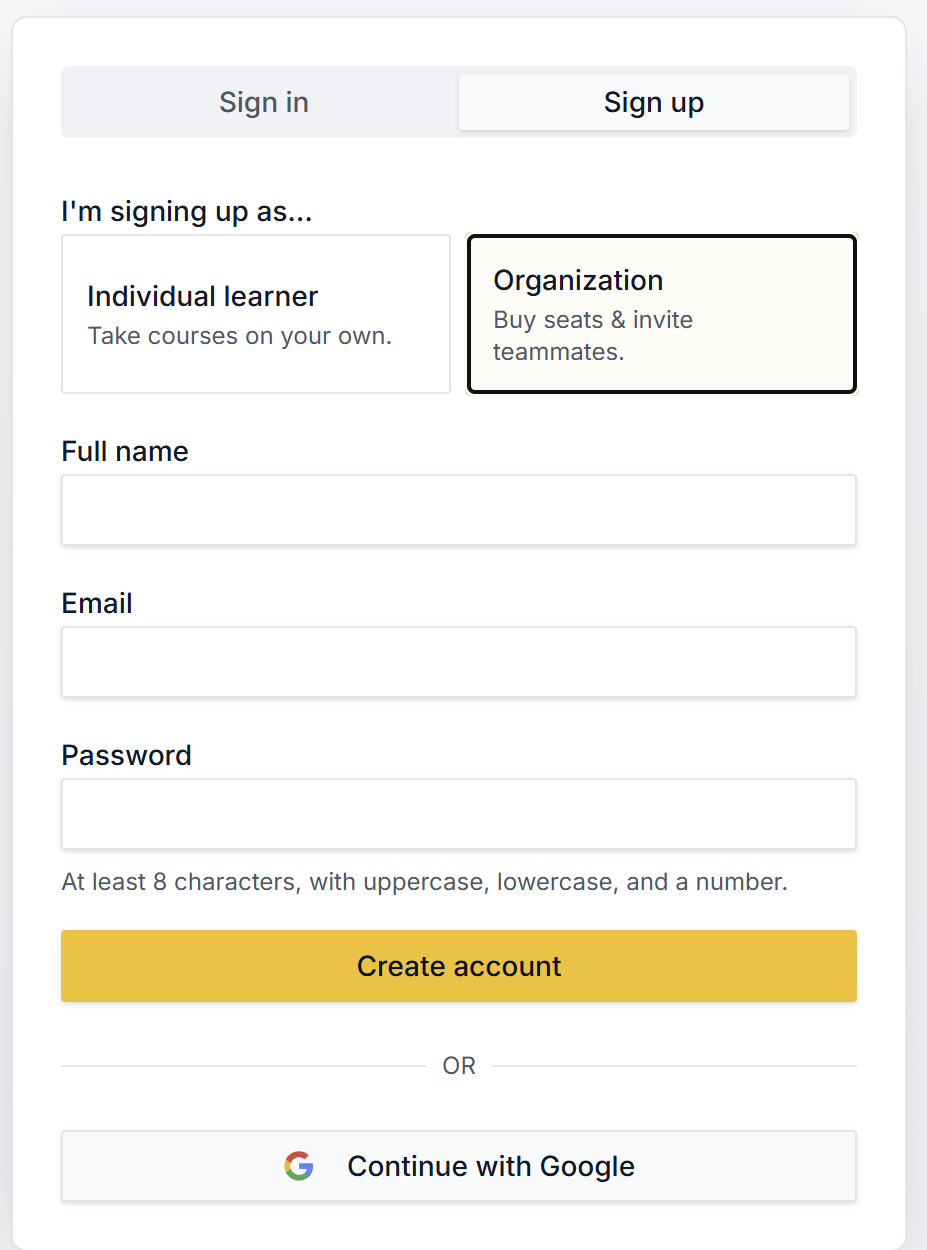
Create your account
Head to the sign-up page and create an account with your work email or Google. If prompted, click the verification link we email you.
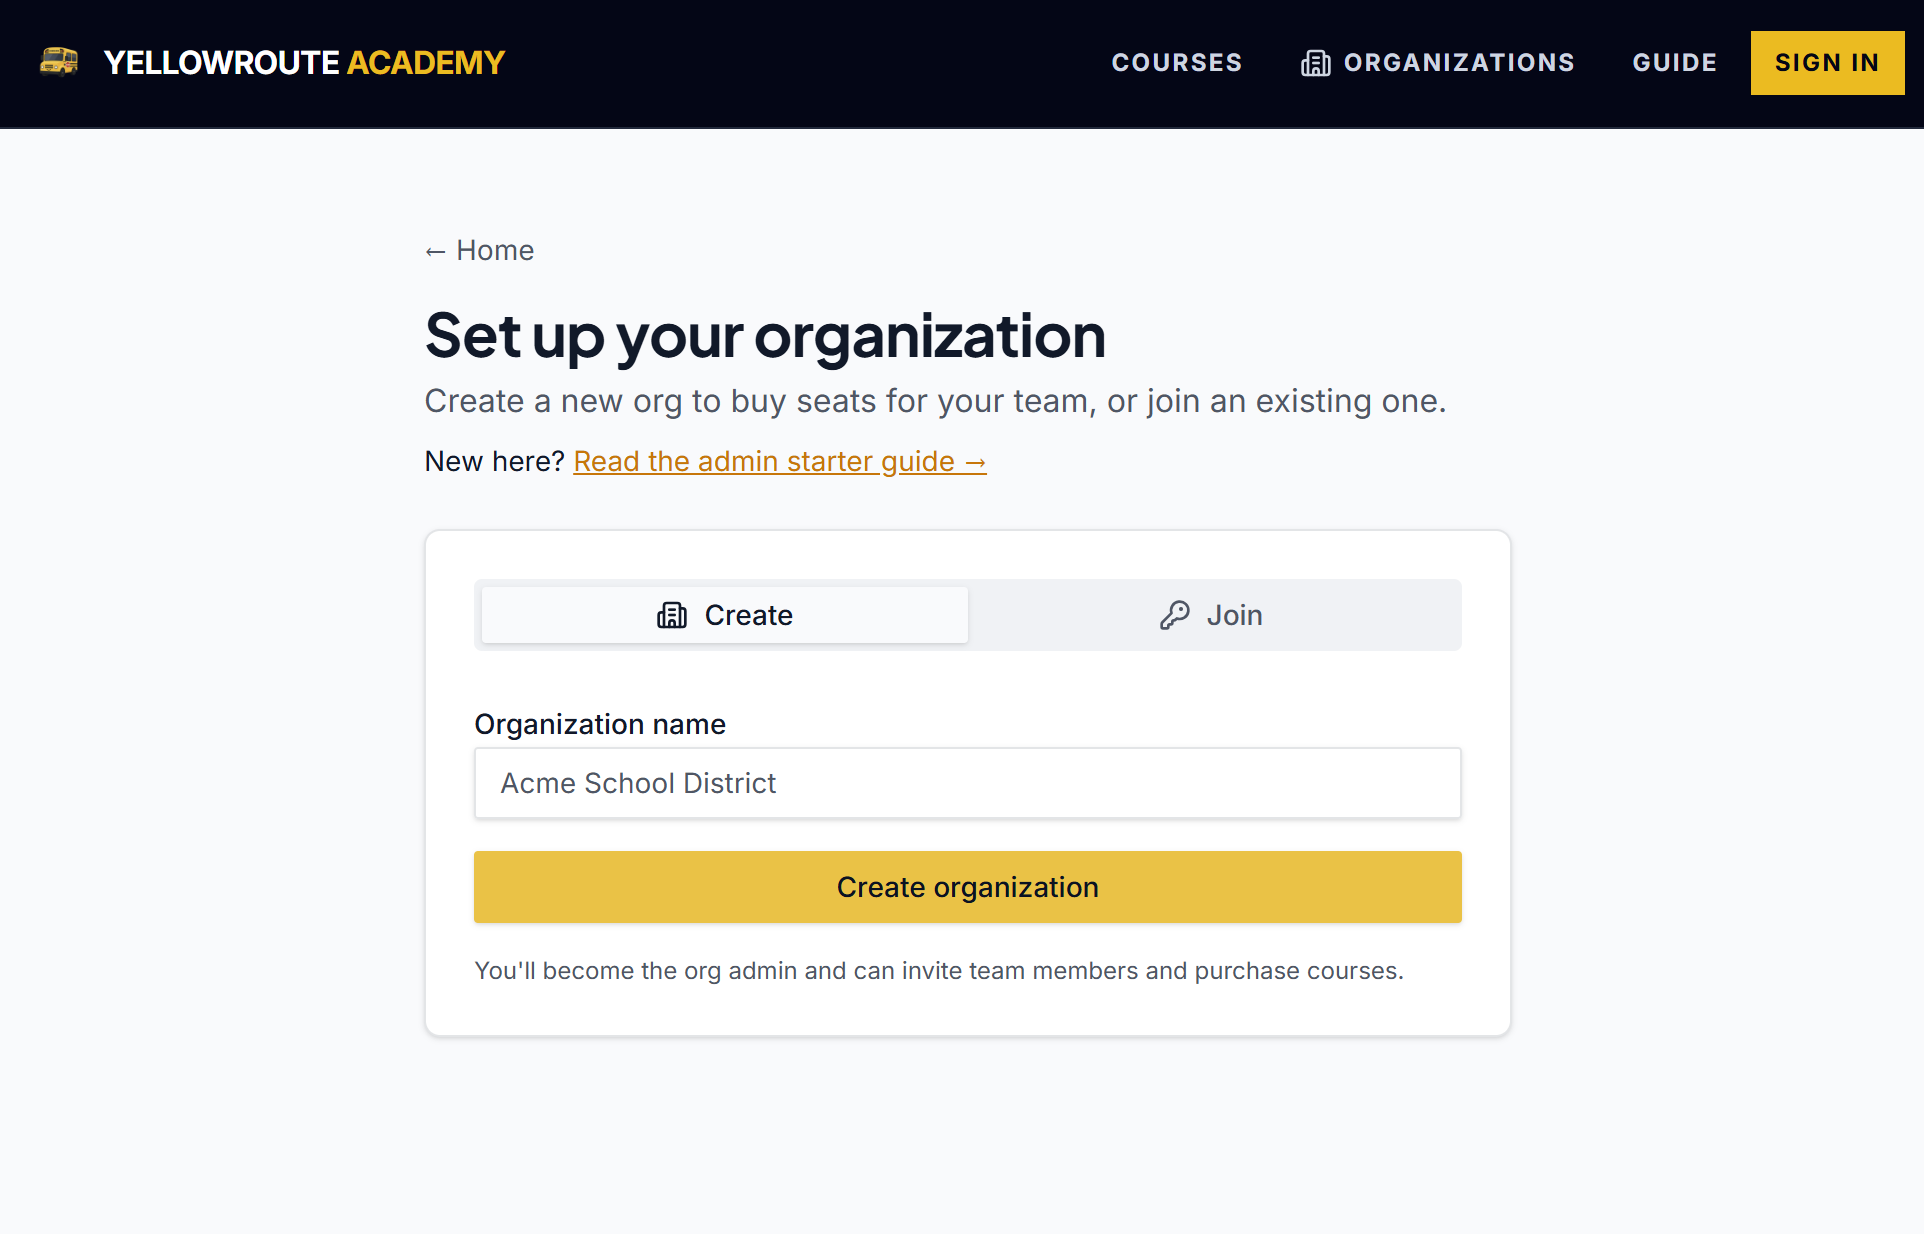
Create your organization
Once you're signed in, open Create or join an organization and enter your organization's name (e.g. "Acme School District").
- You're automatically set as the org admin.
- You can rename the organization later from the org page.
- One person can be admin of multiple organizations.
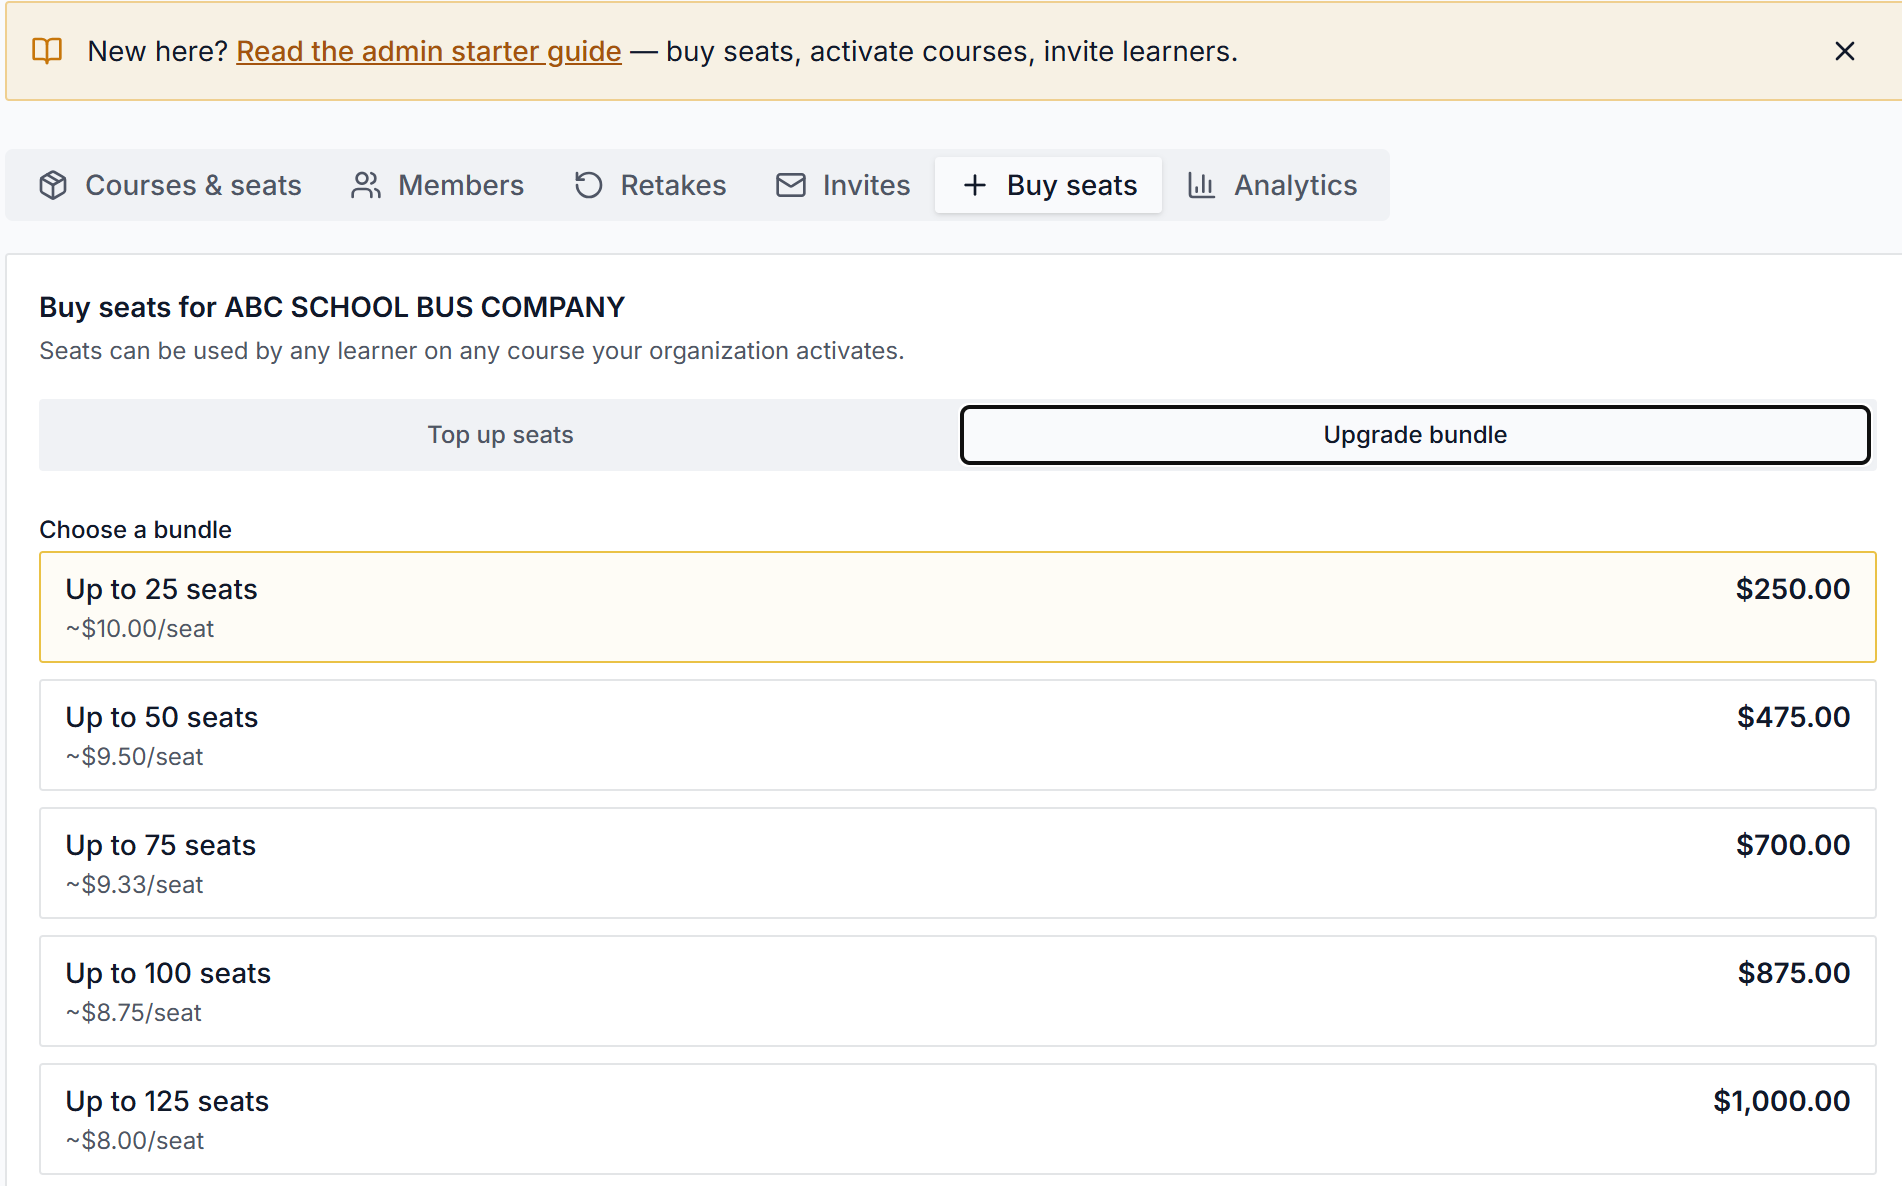
Buy seats
On your org page, open the Buy seats tab. You have two options:
Activate courses
On the Courses & seats tab, toggle on each course you want your team to take. Activation is free — seats are only used when a learner actually enrolls.
- Activate as many courses as you like — your seat pool is shared across all of them.
- Set a custom certificate validity period per course with the Edit button if your state requires it.
- Deactivate a course any time; it just hides it from new enrollments.

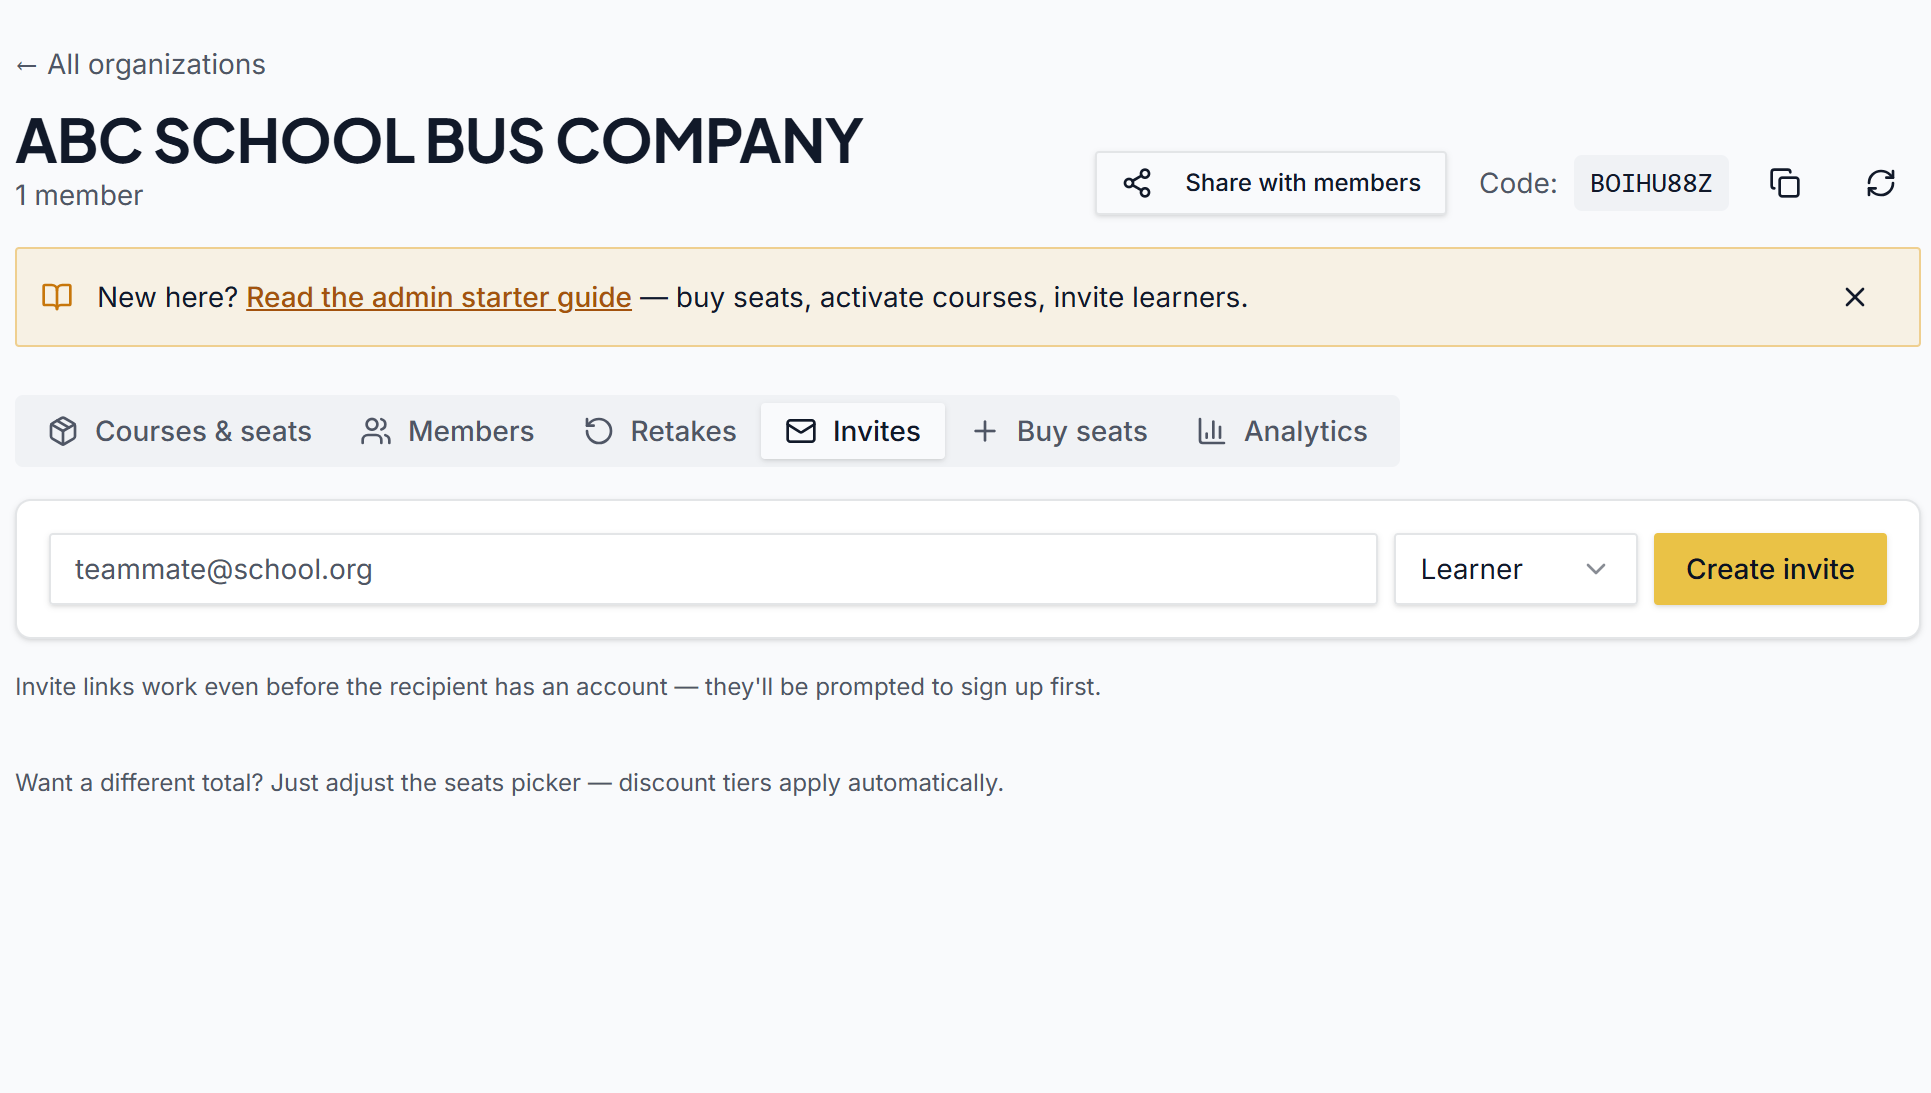
Invite & share with learners
There are two ways to onboard learners. Most orgs use both.
On the Invites tab, enter a learner's email and choose their role (learner or co-admin). They'll get an email with a one-click link that drops them straight into your org.
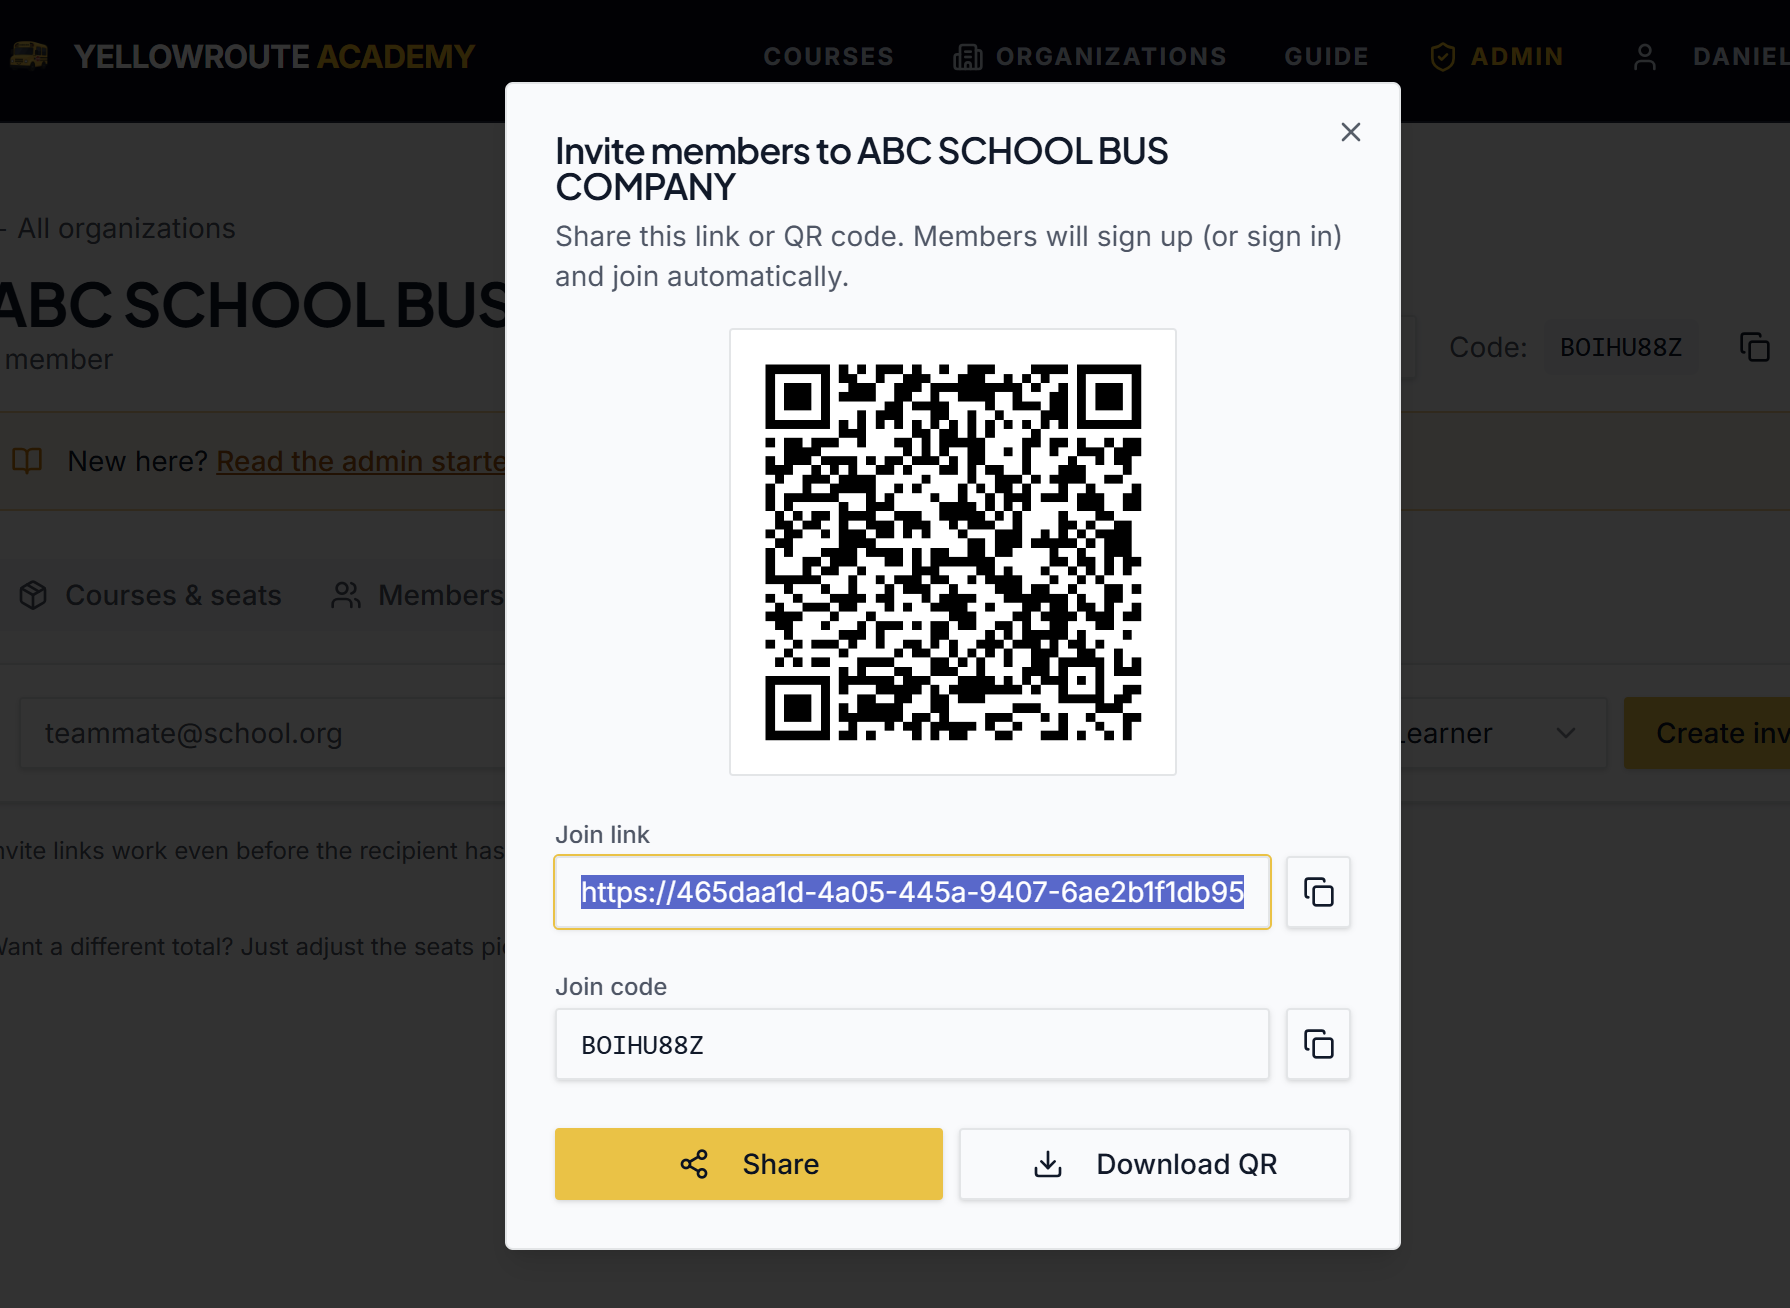
Every organization has a short join code (shown at the top of your org page). Share the code, or share the join link from the Share button. Learners sign up, enter the code on the join page, and are added automatically.
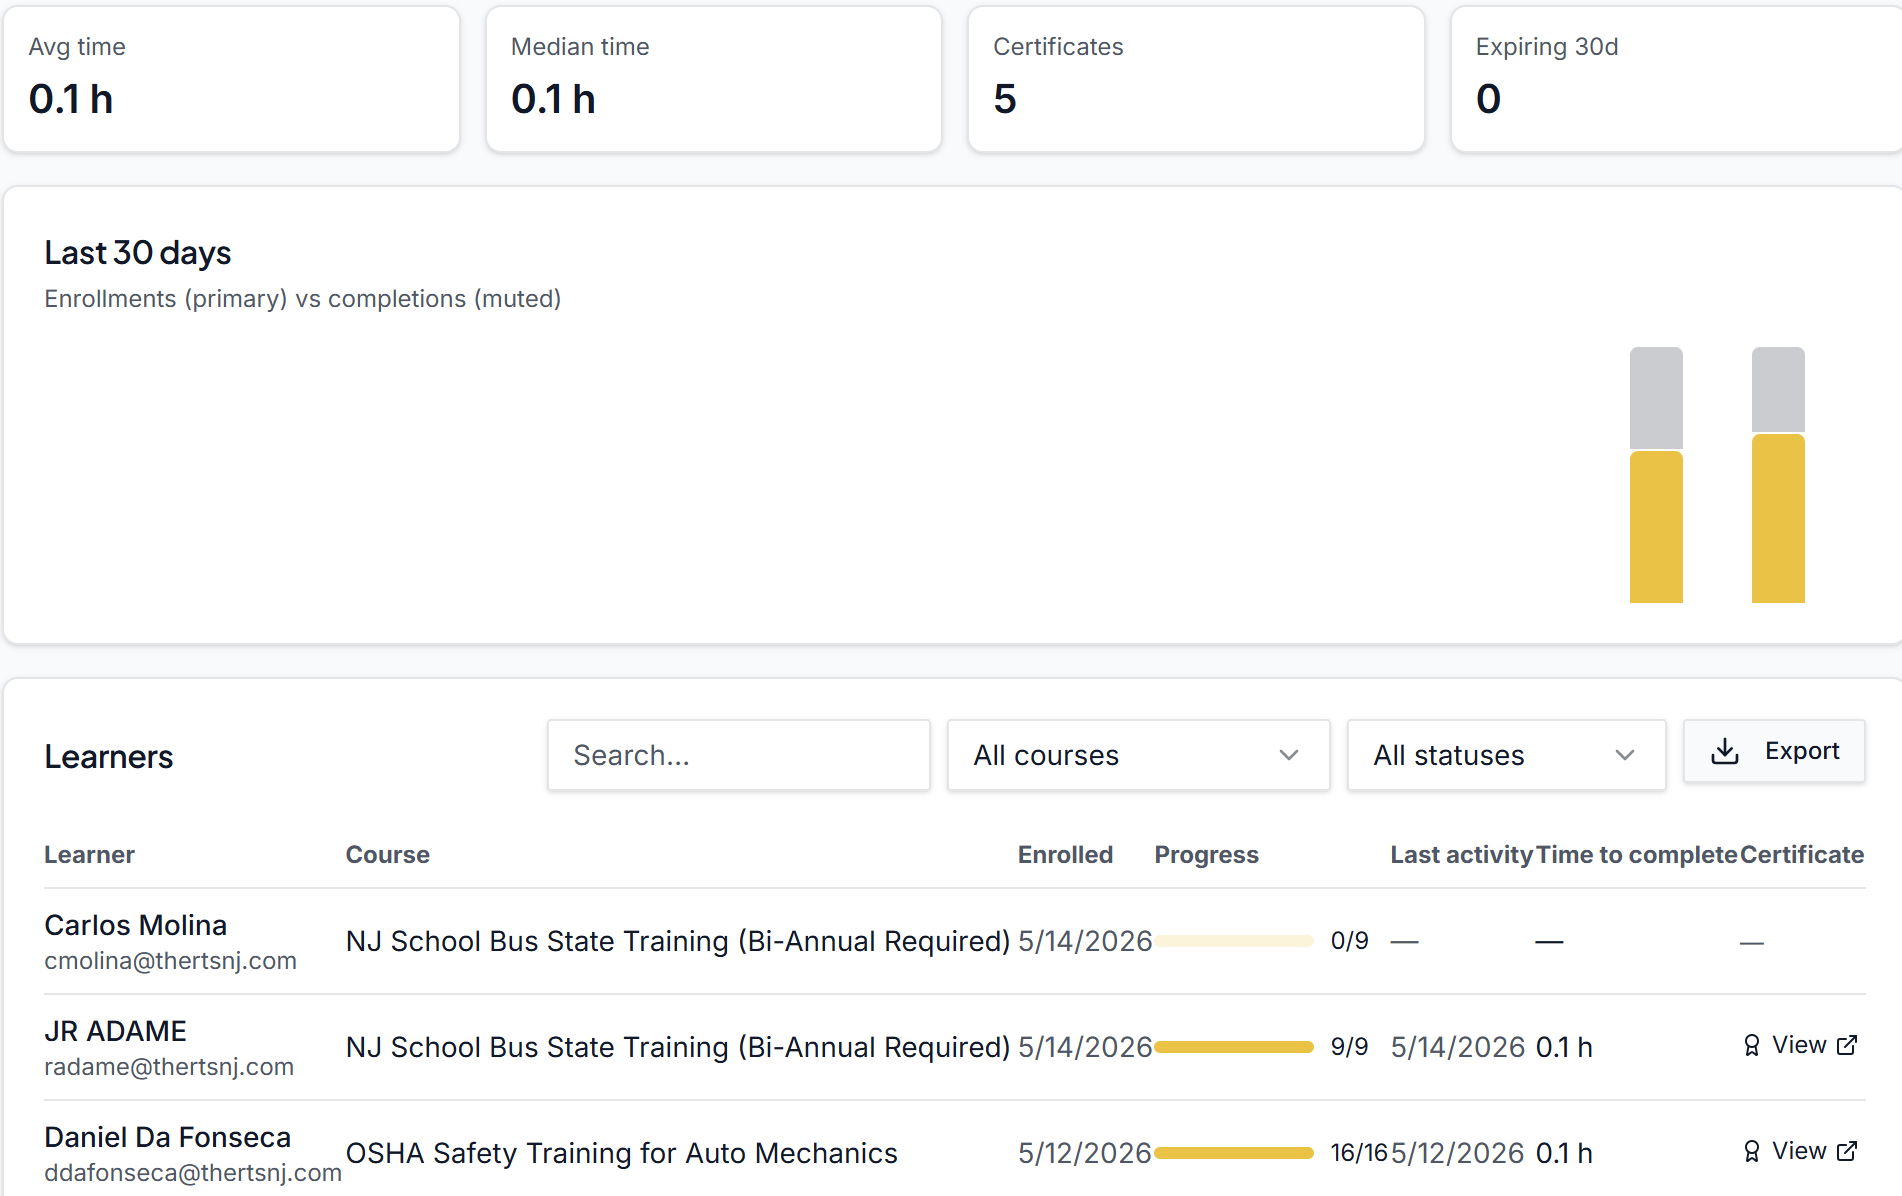
Track progress
Once learners are in, you have a few admin tools:
- Members — see who's enrolled, their progress, and completed courses.
- Analytics — completion rates and certificates issued.
- Retakes — grant a learner another quiz attempt if they don't pass on the first try.